Windows Installer
One way to operate linqi is using a Windows Server with IIS and a Microsoft SQL Server as the backend. For such a setup, linqi can provide you with an MSI installer. This makes the installation extremely simple, requiring you only to specify the necessary configuration values.
Prerequisites
Details regarding the necessary accounts, etc., can be found here.
The following packages must be present/installed on the server where linqi is to be installed:
- IIS
- If you want to use Windows Auth, you must also enable the corresponding IIS feature.
- .Net 10 Hosting Bundle
Components
The installer delivers the following components:
- linqi Token Server:
This web application manages user logins. - linqi App Server:
This web application represents the main linqi application; i.e., processes can be designed and executed in this application. - linqi Global Admin:
This web application allows selected users to perform central configurations in linqi, such as colors and user rights. - linqi Encryption Tool:
This application allows you to encrypt values in order to perform manual adjustments to linqi's settings later.
Installation
The following steps are required for installation:
- Copy the MSI installer to the server where linqi is to be installed.
- Start the MSI installer.
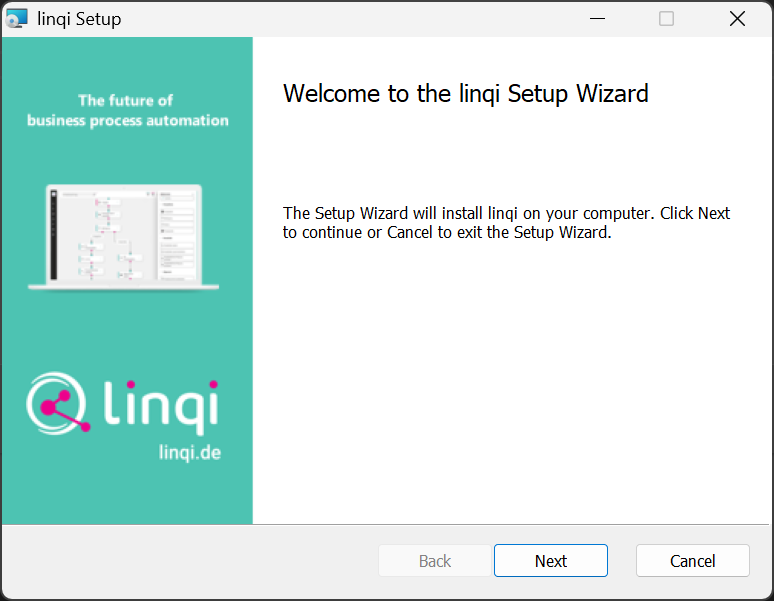
- Start:
Click Next.
- Components:
Now select the components to be installed. In most cases, it makes sense to install all components.
This allows you to set up all linqi services in a load-balanced manner.
You can also adjust the paths here; however, web service components (linqi Token Server, linqi App Server, linqi Global Admin) should be located underC:\inetpub\wwwroot.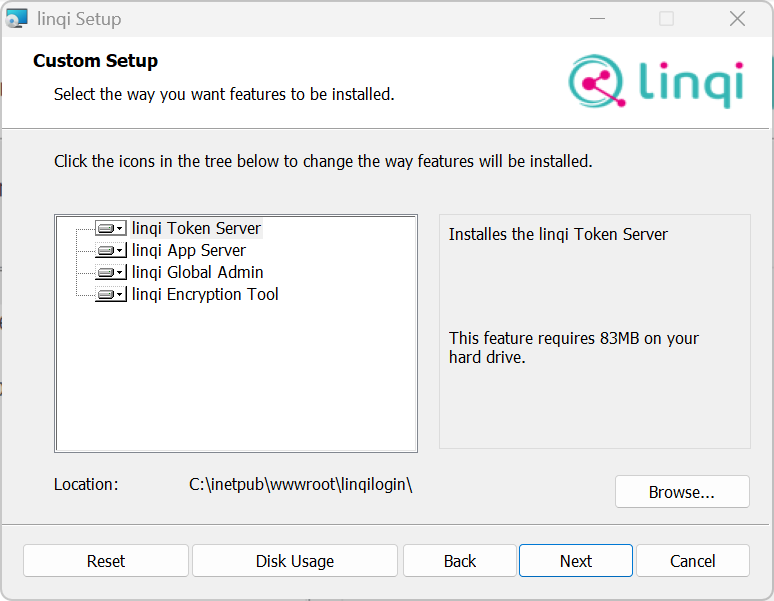
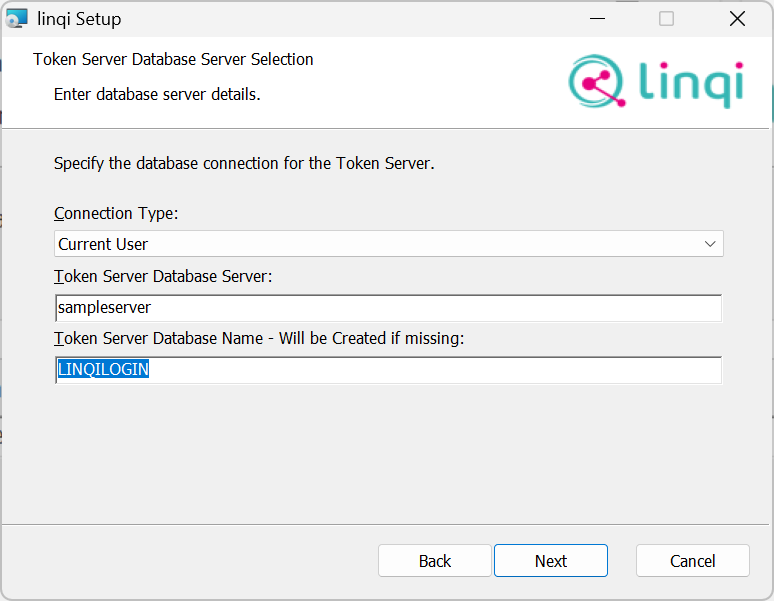
- Token Server Database Settings:
Now you must specify the data of the SQL Server where the Token Server stores its configuration.
You have two options:- Connectionstring:
Here you specify a connection string that points to an existing database.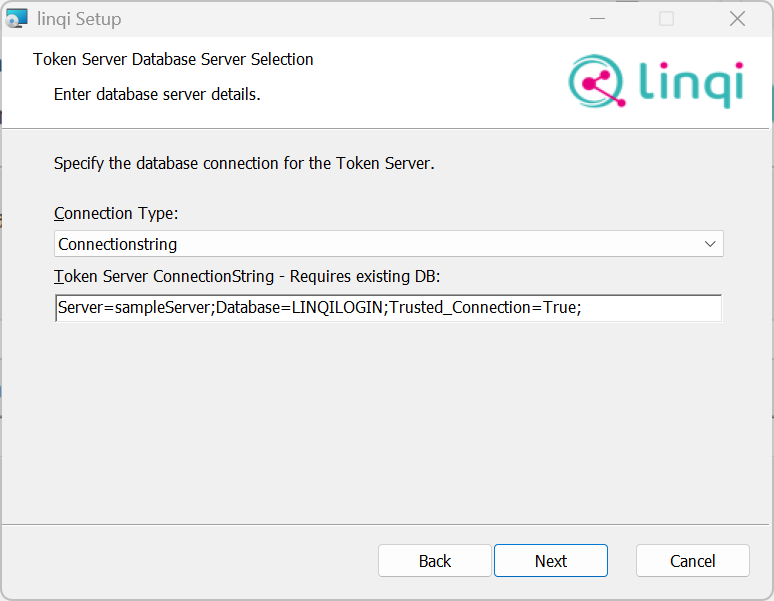
- Current User:
With this setting, linqi connects to the SQL Server in the context of the current user and creates a database if necessary. This also means that the currently logged-in user must have appropriate rights on the SQL Server.
Token Server Database Server: Enter the name of the SQL Server here.
Token Server Database Name: Enter the name of the database to be used for the Token Server here. If it does not exist, it will be created.
- Connectionstring:
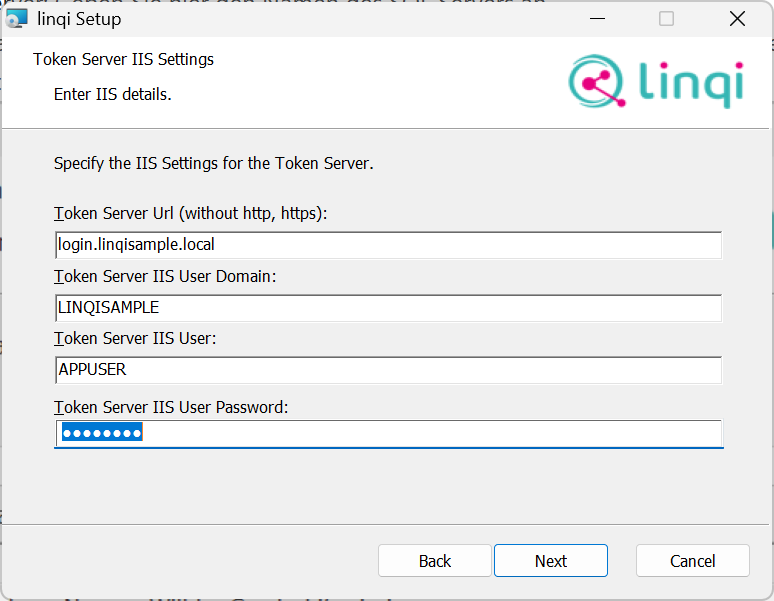
- Token Server IIS Settings:
Here you must now define the IIS settings for the Token Server.
Token Server URL: Enter the URL here without https or http, under which the Token Server is reachable.
Token Server IIS User Domain: Enter the domain here in which the account running the App Pool is registered.
Token Server IIS User: Enter the name of the user here under which the Token Server App Pool runs. If you use Current User in the database settings or a connection string with Trusted_Connection, this account must have access rights to the Token Server database.
Token Server IIS User Password: Enter the user's password here.
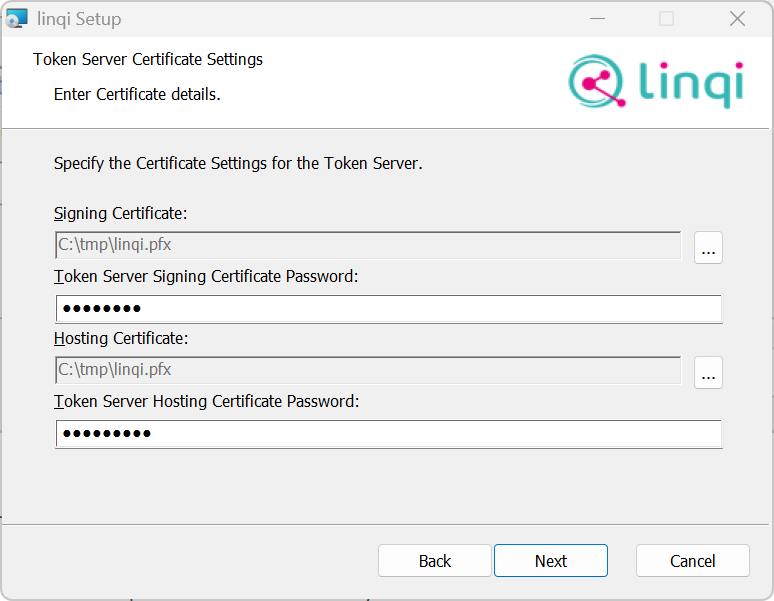
- Token Server Certificate Settings:
In this step, you must specify the necessary certificates for token signing as well as SSL connections.
Signing Certificate: Enter the path to a certificate here that the Token Server can use to sign tokens. The certificate must be in PFX format with a password. You can also use, for example, the SSL certificate used for hosting.
Token Server Signing Certificate Password: Enter the password of the signing PFX file here.
Hosting Certificate: Enter the path to an SSL certificate here to be used for the Token Server web application. This certificate must be valid and match the URL of the Token Server. The certificate must be in PFX format.
Token Server Hosting Certificate Password: Enter the password of the hosting PFX file here.
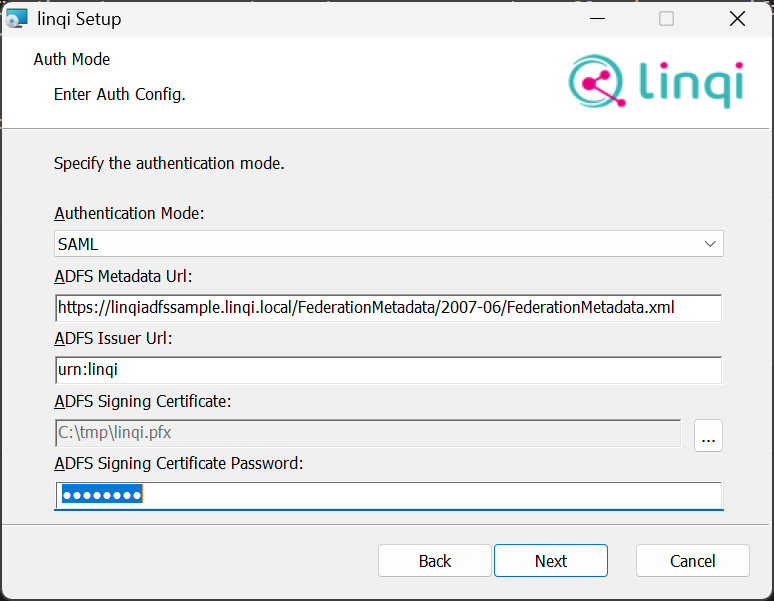
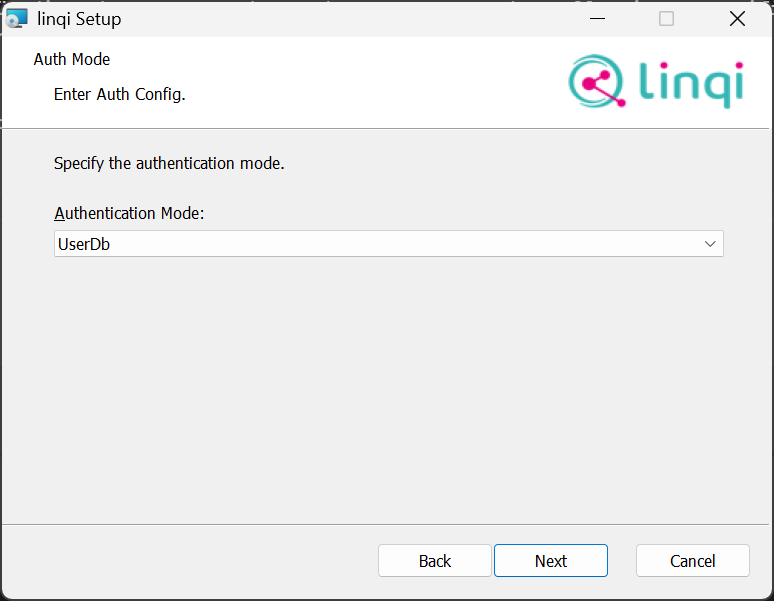
- Auth Mode:
Here you determine how users log in to linqi. The following options are available:- LDAP:
In this case, users are logged in via Windows Auth.
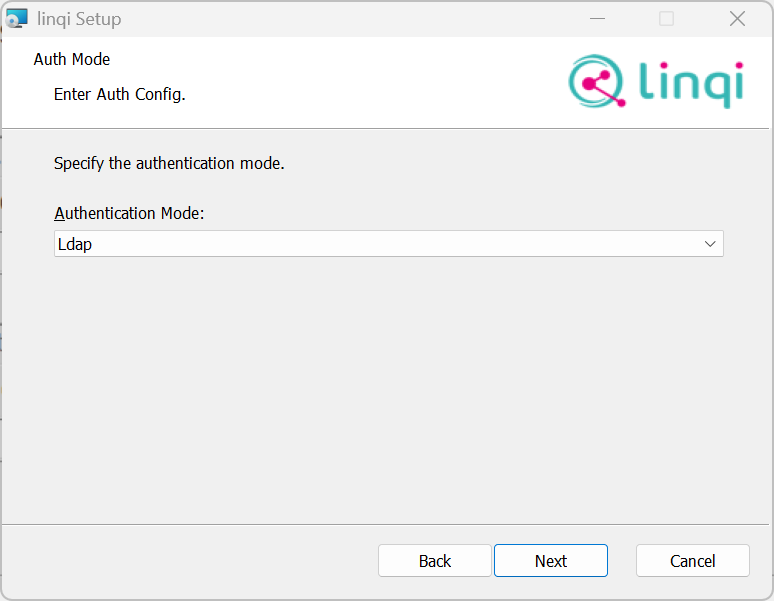
- SAML:
In this case, SAML is used, specifically in conjunction with an AD FS Server.
ADFS Metadata URL: Here you must specify the URL to the AD FS metadata. These typically end in /FederationMetadata/2007-06/FederationMetadata.xml.
ADFS Issuer URL: Here you must specify the issuer that you have registered in AD FS.
ADFS Signing Certificate: Enter the path to the PFX file here that linqi can use to sign SAML requests. This must match the certificate registered in AD FS.
ADFS Signing Certificate Password: Enter the password of the PFX file here.
- UserDb:
In this case, internal linqi user management is used. You can then maintain the accounts for this in the Global Admin area.
- LDAP:
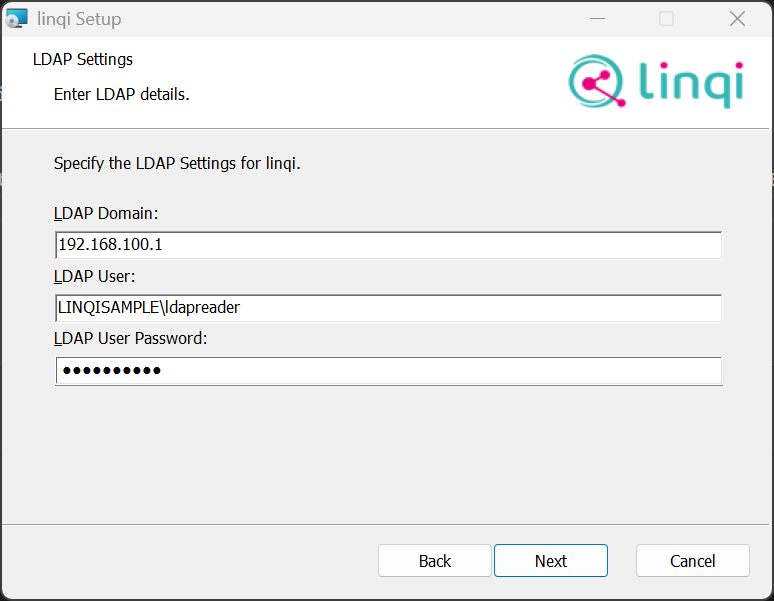
- LDAP Settings:
If you use LDAP or SAML for authentication, you must provide an account here that has read rights on the Active Directory. This is used, for example, for user selection.
LDAP Domain: Enter the name of the domain or the IP of one of the Domain Controllers here.
LDAP User: Enter the name of the account used for requests here. This account must be specified with the domain.
LDAP User Password: Enter the password of the account sending the LDAP requests here.
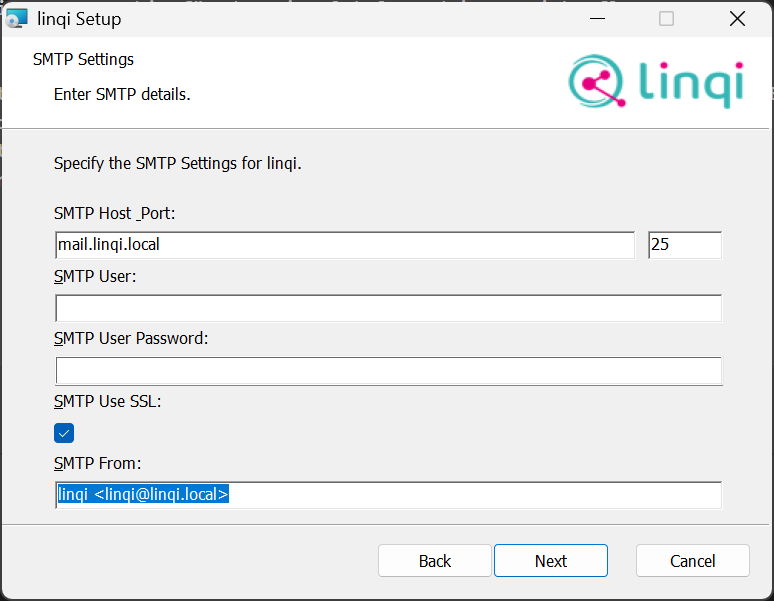
- SMTP Settings:
If you want to send emails from linqi (e.g., via the Send Email Action), you must specify the SMTP settings here.
SMTP Host: Enter the hostname of the SMTP server here.
SMTP Port: Enter the port of the SMTP server here.
SMTP User: If the SMTP server requires a user to send emails, you must enter the username here.
SMTP User Password: If you have specified a user, you must enter the corresponding password here.
SMTP Use SSL: Activate this option if the connection to the SMTP server should be made via SSL.
SMTP From: Enter the sender's name here. This can be in the format Name <Email>, but varies depending on the SMTP server.
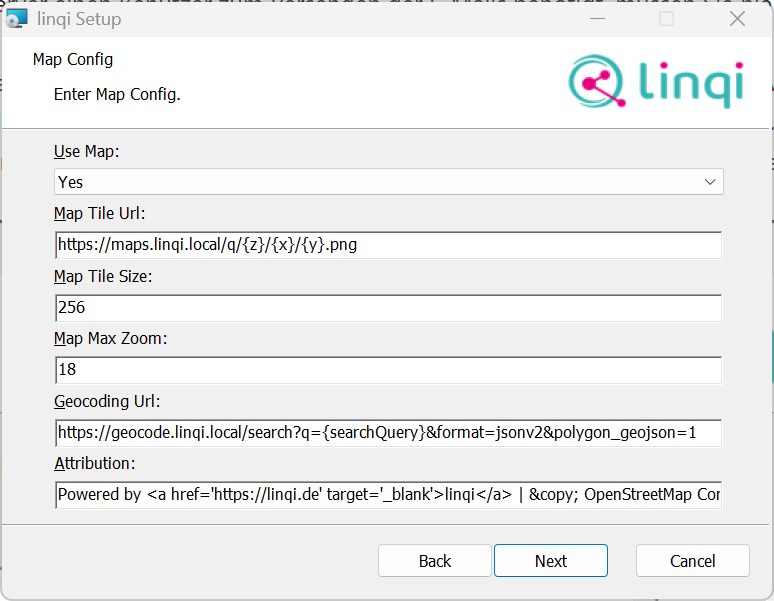
- Map Settings:
If you want to use a map in a form, you can connect the corresponding map service here and select Yes.
Map Tile URL: Enter the URL used to query map images here. Details on usable placeholders like zoom level can be found here.
Map Tile Size: Enter the size of the individual map images here.
Map Max Zoom: Enter the maximum zoom level supported by the map service here.
Geocoding URL: If you use a geocoding service to allow users to search for places, etc., you must enter the URL here. You can use {searchQuery} as a placeholder. This is replaced by the search text.
Attribution: Here you can provide an HTML text displayed at the bottom of the map to provide license information regarding the map data provided.
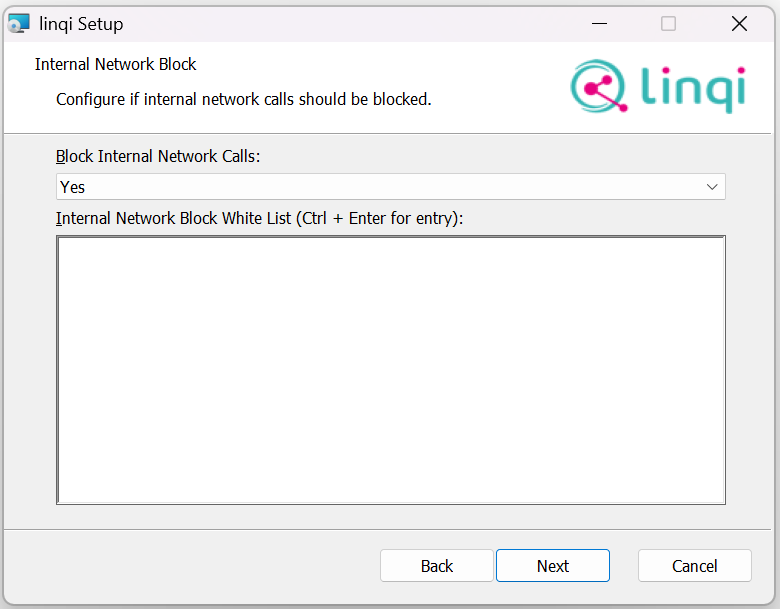
- Block internal network connections:
Here you can determine whether linqi is allowed to make network calls to internal systems. You have the following options:
Block Internal Network Calls:- No: linqi is allowed to make arbitrary HTTP, SQL, etc. calls.
- Yes: linqi is not allowed to call internal systems, e.g., via HTTP Actions, and blocks corresponding attempts. Using the whitelist displayed below, you can enter hostnames that may still be queried regardless.
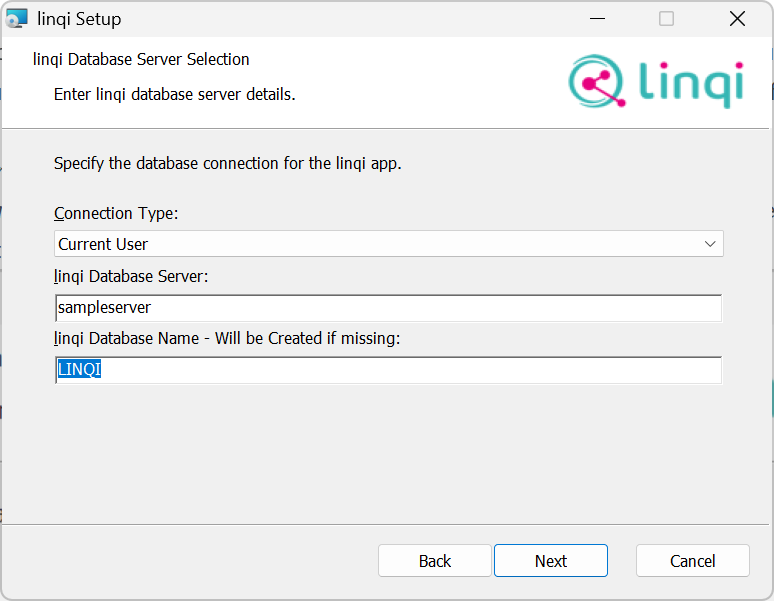
- App Server Database Settings:
Now you must specify the data of the SQL Server where linqi stores its data.
You have two options:- Connectionstring:
Here you specify a connection string that points to an existing database.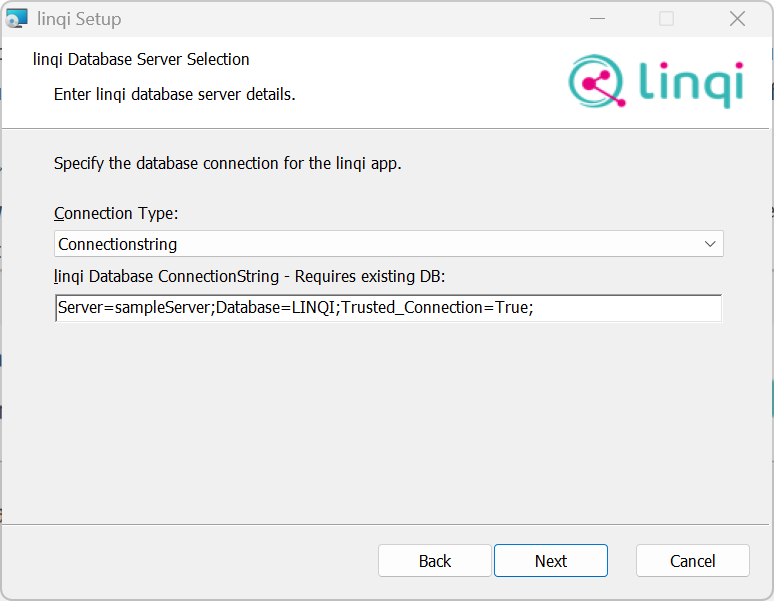
- Current User:
With this setting, linqi connects to the SQL Server in the context of the current user and creates a database if necessary. This also means that the currently logged-in user must have appropriate rights on the SQL Server.
linqi Database Server: Enter the name of the SQL Server here.
linqi Database Name: Enter the name of the database to be used for the App Server here. If it does not exist, it will be created.
- Connectionstring:
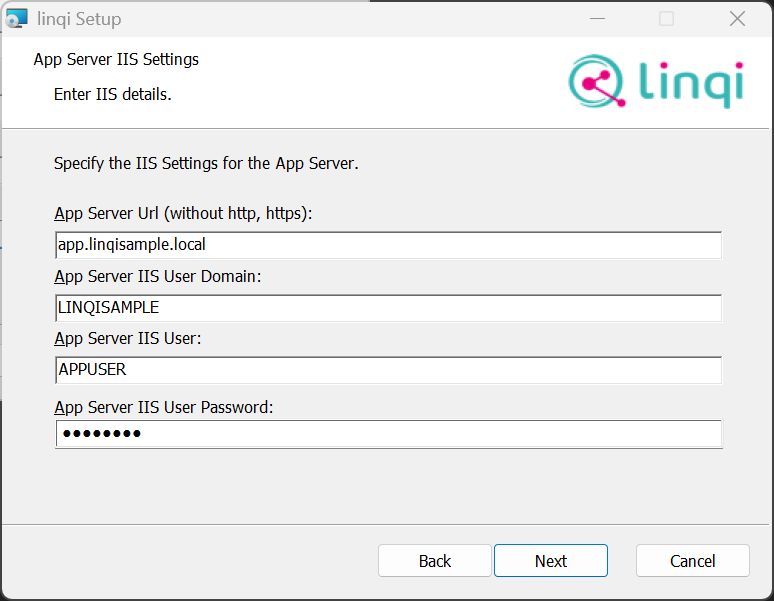
- App Server IIS Settings:
Here you must now define the IIS settings for the App Server.
App Server URL: Enter the URL here without https or http, under which the App Server is reachable.
App Server IIS User Domain: Enter the domain here in which the account running the App Pool is registered.
App Server IIS User: Enter the name of the user here under which the App Server App Pool runs. If you use Current User in the database settings or a connection string with Trusted_Connection, this account must have access rights to the App Server database.
App Server IIS User Password: Enter the user's password here.
- App Server Certificate Settings:
In this step, you must specify the necessary certificates for the SSL connection with the App Server.
App Server Hosting Certificate: Enter the path to an SSL certificate here to be used for the App Server web application. This certificate must be valid and match the URL of the App Server. The certificate must be in PFX format.
App Server Hosting Certificate Password: Enter the password of the hosting PFX file here.

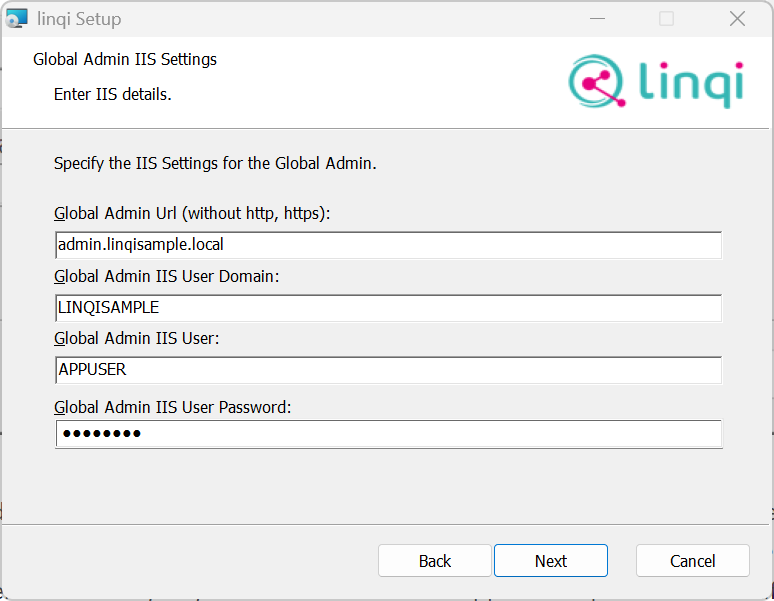
- Global Admin Server IIS Settings:
Here you must now define the IIS settings for the Admin Server.
Global Admin URL: Enter the URL here without https or http, under which the Admin Server is reachable.
Global Admin IIS User Domain: Enter the domain here in which the account running the App Pool is registered.
Global Admin IIS User: Enter the name of the user here under which the Admin Server App Pool runs. If you use Current User in the database settings or a connection string with Trusted_Connection, this account must have access rights to the App Server database.
Global Admin IIS User Password: Enter the user's password here.
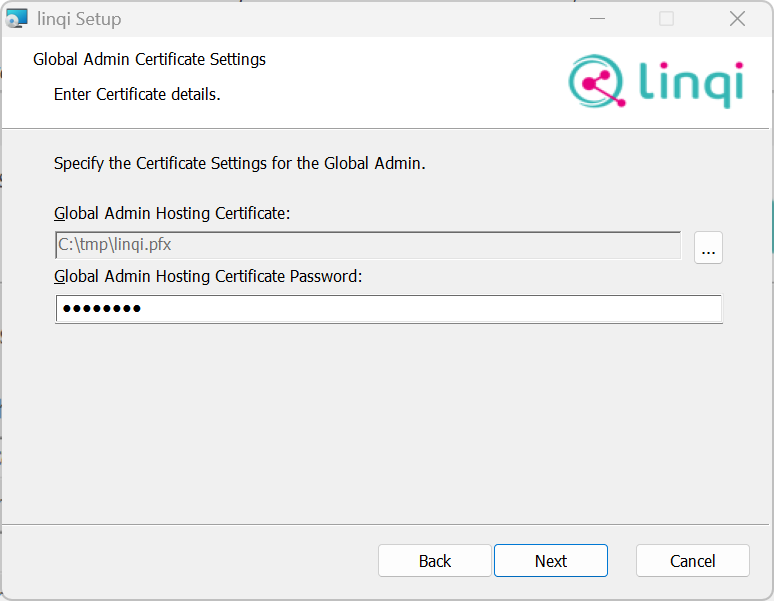
- Global Admin Server Certificate Settings:
In this step, you must specify the necessary certificates for the SSL connection with the Global Admin Server.
Global Admin Hosting Certificate: Enter the path to an SSL certificate here to be used for the Global Admin Server web application. This certificate must be valid and match the URL of the Global Admin Server. The certificate must be in PFX format.
Global Admin Hosting Certificate Password: Enter the password of the hosting PFX file here.
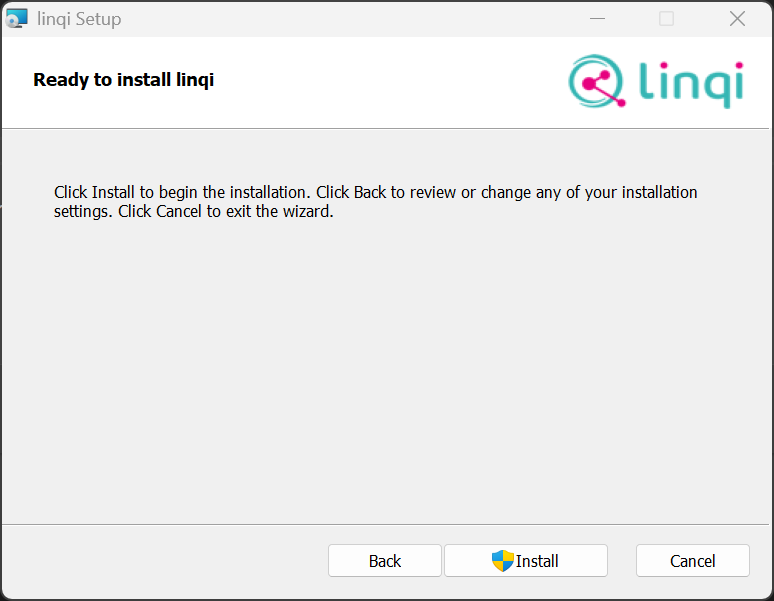
- Start Installation:
Now click Install to start the installation.