Expand process
Now that you have learned the basics of forms and actions in the last steps, we will expand on the process in this step.
To do this, we will add an approval step and send an email based on the decision.
Create approval form
Forms in linqi are versatile, so you can of course also use a form to obtain approval.
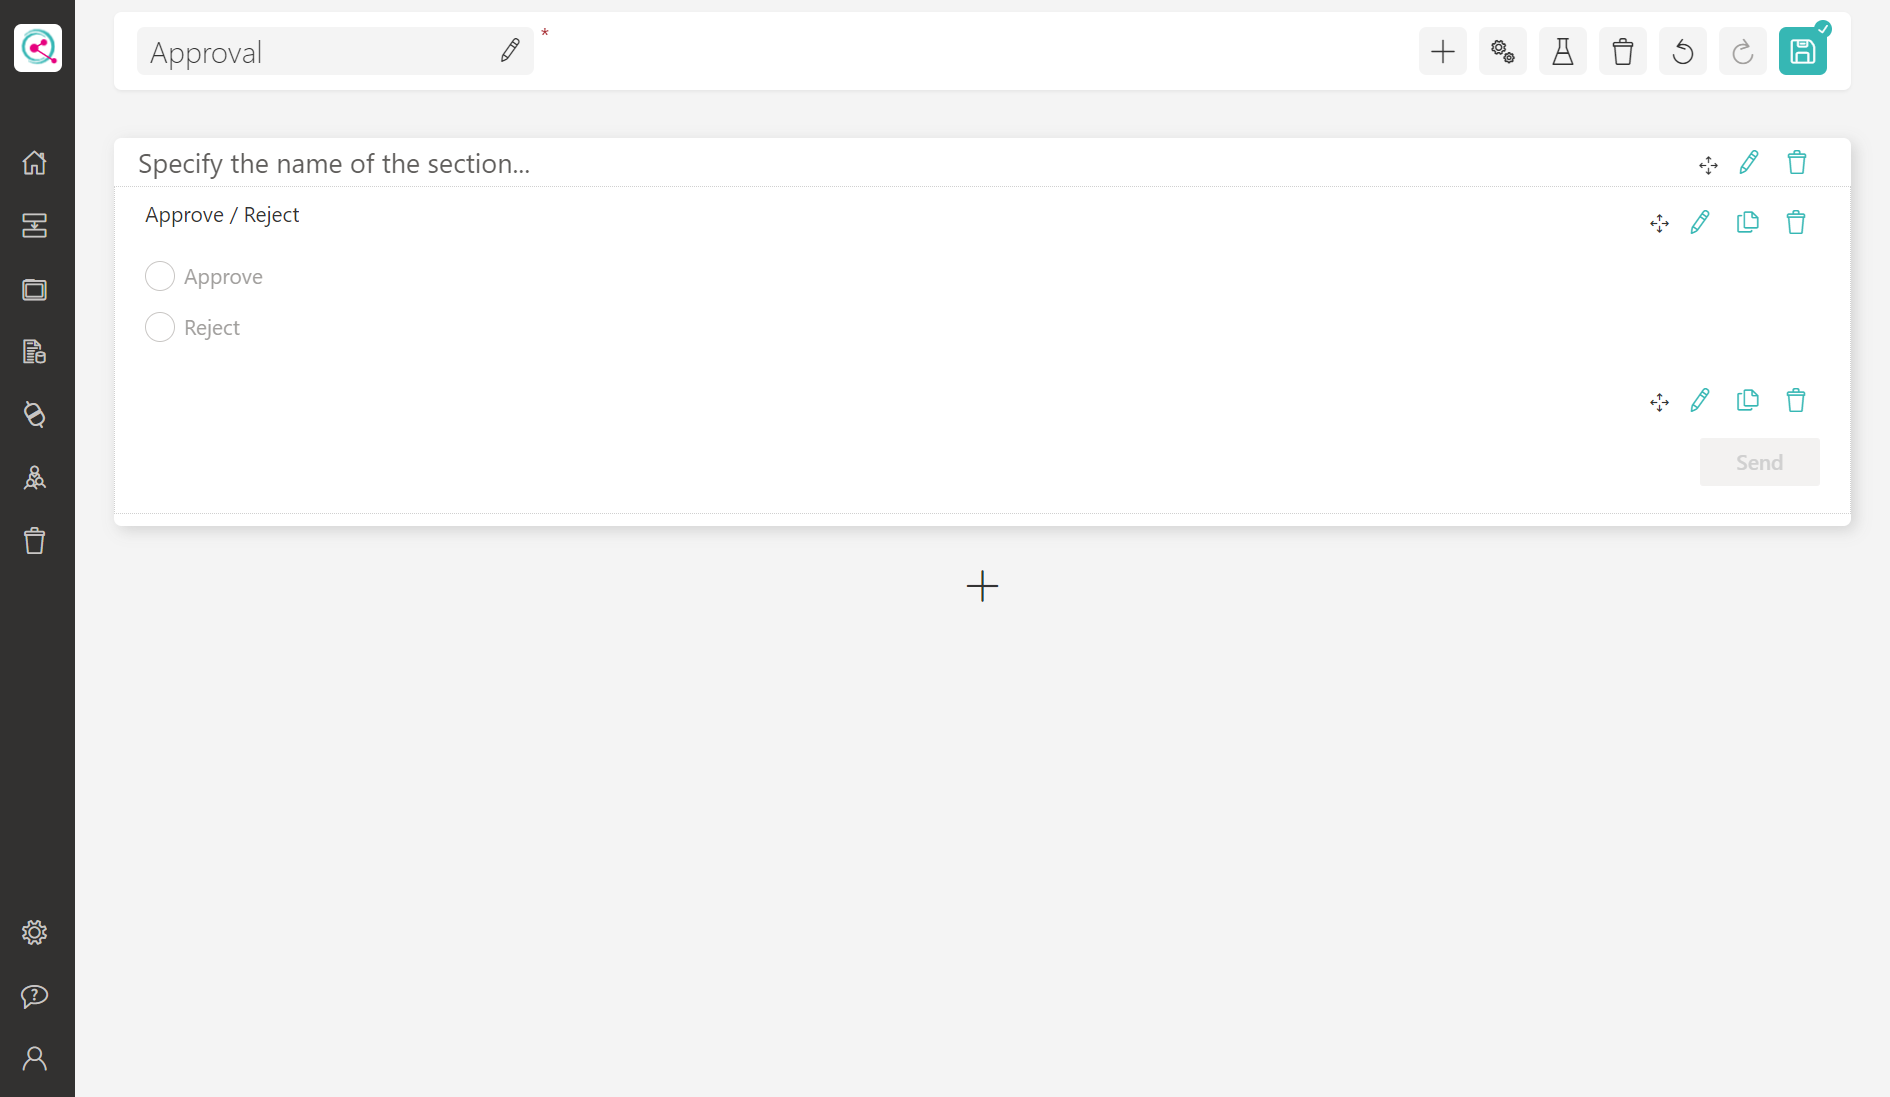
To insert an approval step, you must therefore create a new form. You can do this as follows as in the previous step:
- Open form list ( button).
- Create new form via button
- Enter authorization as name top left
- Insert single-line section via the + in the lower area of the form designer
- Open the list of available controls via the + at the top right of the form designer
- Insert radio button
- Insert button below
- Close the list of available controls via the X
- Customize settings of the option field ( icon on the right side of the option field)
- Set title to Approve / Reject
- Insert Approve and Reject as individual lines in the options (each line provides a selection option)
- Click the Apply button to apply the settings of the option field
- Customize the settings of the button ( icon on the right side of the button)
- Set title to Submit
- Click the Apply button to apply the button settings
- Save form
The approval form is now complete and the process flow can be extended.
Extend process flow
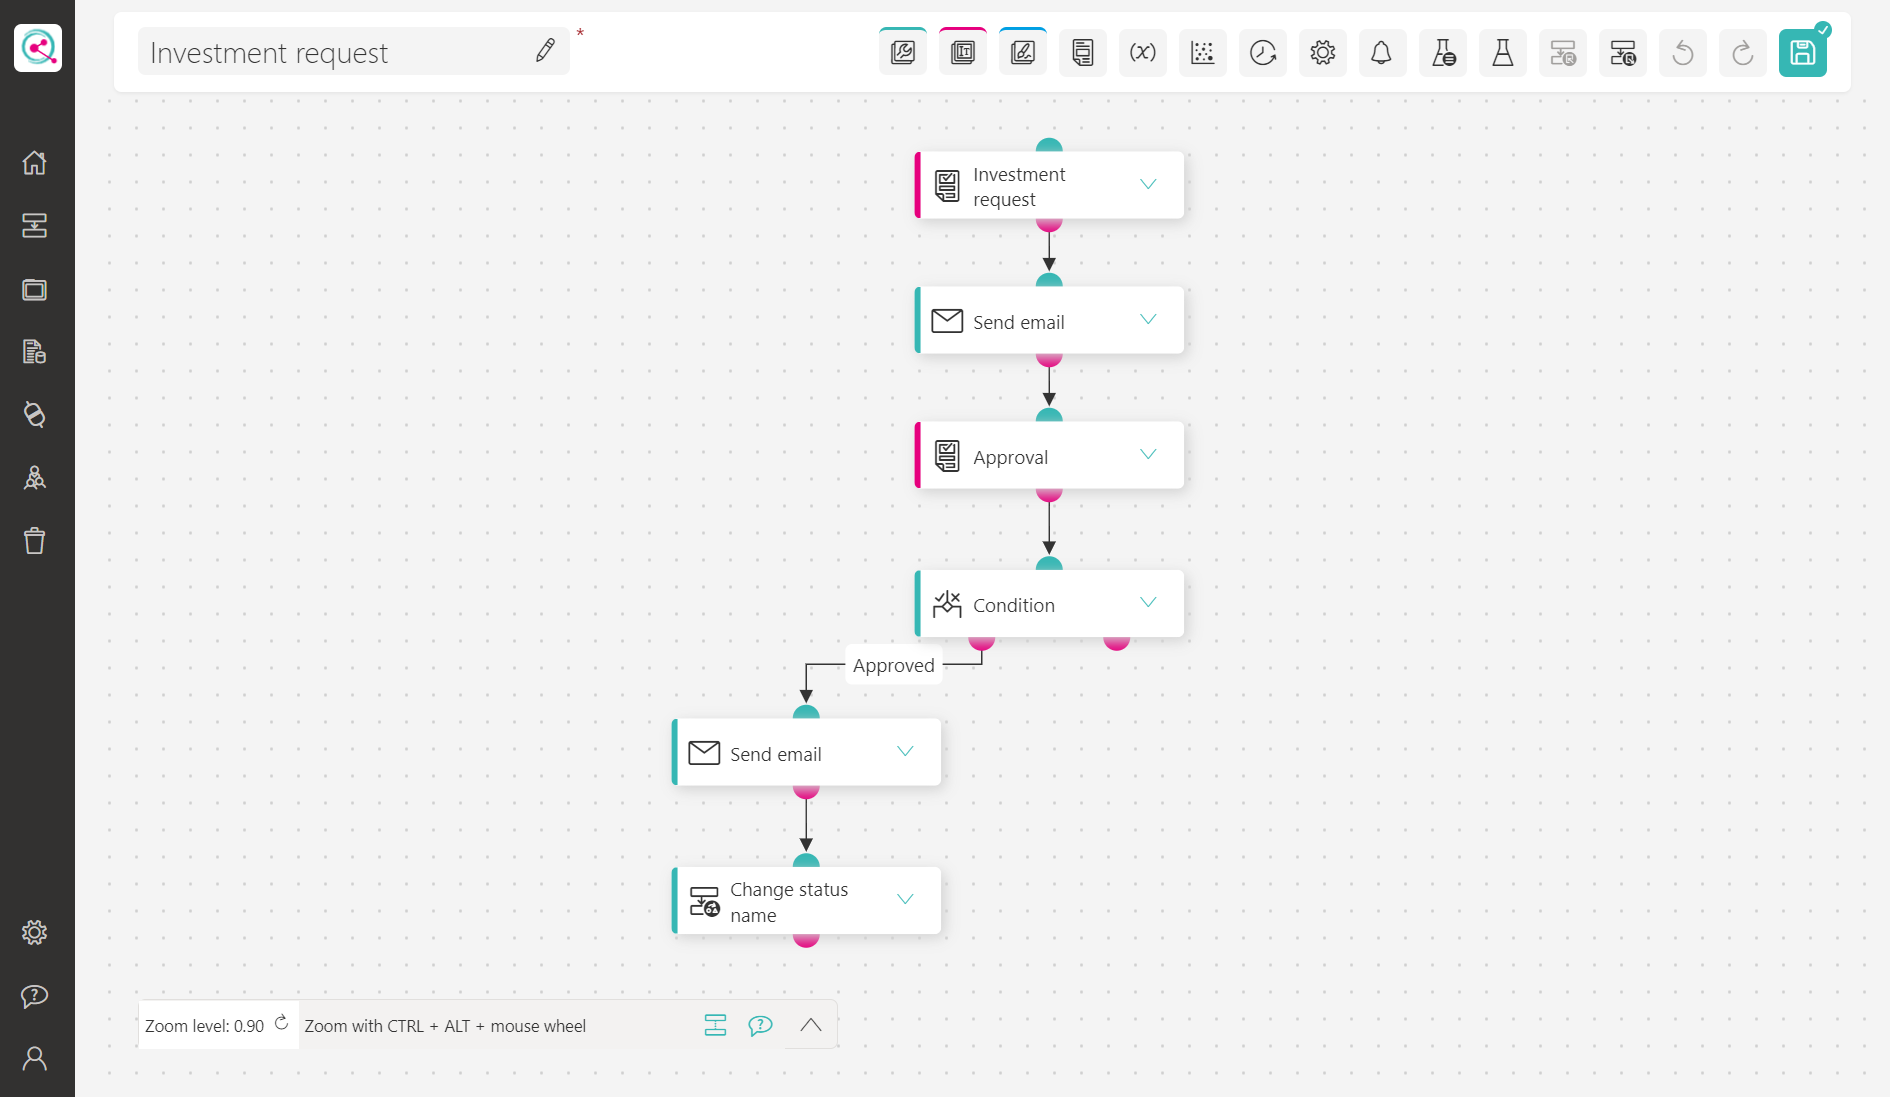
The new form must now be integrated into the process flow. This is also done in the same way as before:
- Switch the tab back to the process designer, or open the process again via the process list
- Open form list ( button)
- Insert form below the send email action using drag'n'drop
- Link the starting point of the send email action with the entry point of the form
In the next step, a condition must be inserted to allow the process to run differently depending on the selection in the form. The following steps are necessary for this:
- Open the list of available actions ( button).
- Insert conditional action below the newly inserted approval form
- Close the list of available actions via the X
- Drag the starting point of the new approval form into the inserted condition action
- Double-click on the condition action to open the configuration
- Insert new condition within the configuration panel using the button
- For example, you can enter Approved as the name for the condition. This display name will help you to understand the process flow later.
- For Select value, insert a placeholder that refers to the option field in the approval form (Select form: Approval, Select control: Approve / Reject, Formatting: Control Value)
- Select Is Equal as the operator
- Enter Approve as the comparison value
- You can apply the configuration by clicking Apply
As you can see, the condition has two starting points after the configuration has been adjusted. You can connect these starting points to define within linqi what should happen in the process if the condition is fulfilled and what should happen otherwise.
In this simple example, we will now send an e-mail and define the process status. You can do this as follows:
- Open the list of available actions ( button)
- Insert a Send email action on the left below the condition
- Insert a Change status name action below this new action
- Connect the Approved starting point of the condition action with the entry point of the newly inserted Send email action.
Note: If you hover over the condition node with the mouse, the names of the starting points are displayed. - Then connect the starting point of the newly inserted Send email action with the entry point of the Change status name action.
- Double-click on the newly inserted Send email action to configure it
- Insert a placeholder for the e-mail address of the process initiator as the recipient. This way, the person who started the process receives the confirmation. (Type of placeholder: Process values, Select value: Process initiator, Formatting: Email)
- Enter Investment approved as the subject
- Within the message, you can enter a short text informing the person that the investment has been approved. You can of course also use placeholders to insert the name of the process initiator, for example.
- You can accept the configuration via Apply
- Double-click on the inserted Change status name action
- Enter Approved as the status name
- You can accept the configuration via Apply
- Save the process
In this way, we have defined the behavior of the process when the investment has been approved. Next, we need to define the process flow if the investment is rejected.
Instead of inserting everything from scratch, it is also possible to copy parts of the process in linqi. This allows you to copy the approval string and only slightly adapt the texts of the actions.
To do this, proceed as follows:
- Hold down Ctrl, or ⌘ under Mac, and draw a frame around the two actions of the approval string while holding down the left mouse button.
- Release the left mouse button to select the two nodes and the connection between the two nodes
- Hold down Ctrl, or ⌘ under Mac, and drag one of the nodes to the right with the left mouse button. This will copy all selected nodes
- Connect the starting point of the otherwise starting point of the conditional action with the entry point of the copied Send email action
- Double-click on the copied email Send action to customize the text
- Change the subject to Investment rejected
- Customize the message text so that the person is informed that the investment has been rejected.
- Click on Apply to apply the configuration
- Double-click on the copied Change status name action
- Change the status name to Rejected
- You can apply the configuration by clicking Apply
- Save the process

We have now successfully expanded the process to include a decision. You can of course now test the process again.
You will notice that currently the person who requested the investment can also approve it. In the next step, we will therefore extend the process to include authorization assignment.