Define process flow
Once you have created the form for the investment application, we can now define the process flow. To do this, switch from the Form Designer back to the Process Designer.
Either change the browser tab or navigate back to the process list (), select the investment proposal and open the Process Designer using the Edit button ().
Insert form
To begin with, the newly created form must be inserted as a step in the process. To do this, open the list of forms again using the form button () at the top right of the process designer.
The newly created investment application form appears in this list. You can insert it into the drawing area of the process using drag'n'drop.
In this way, you have inserted the form as the first step (and so far the only step) in the process.
Insert action
To fill the process with life, we will insert a first action. Actions are diverse in nature and can range from a simple e-mail dispatch to the assignment of authorizations to the connection of third-party systems.
Open the list of available actions using the following button:
The list of actions then opens. Similar to the Form Designer, you can simply drag and drop these into the drawing area of the Process Designer. You can therefore view this list as a toolbox that you can use as required.
To start, drag and drop a Send email action below the previously inserted form step. You can then close the list of available actions by clicking on the X above the list.
Configure action
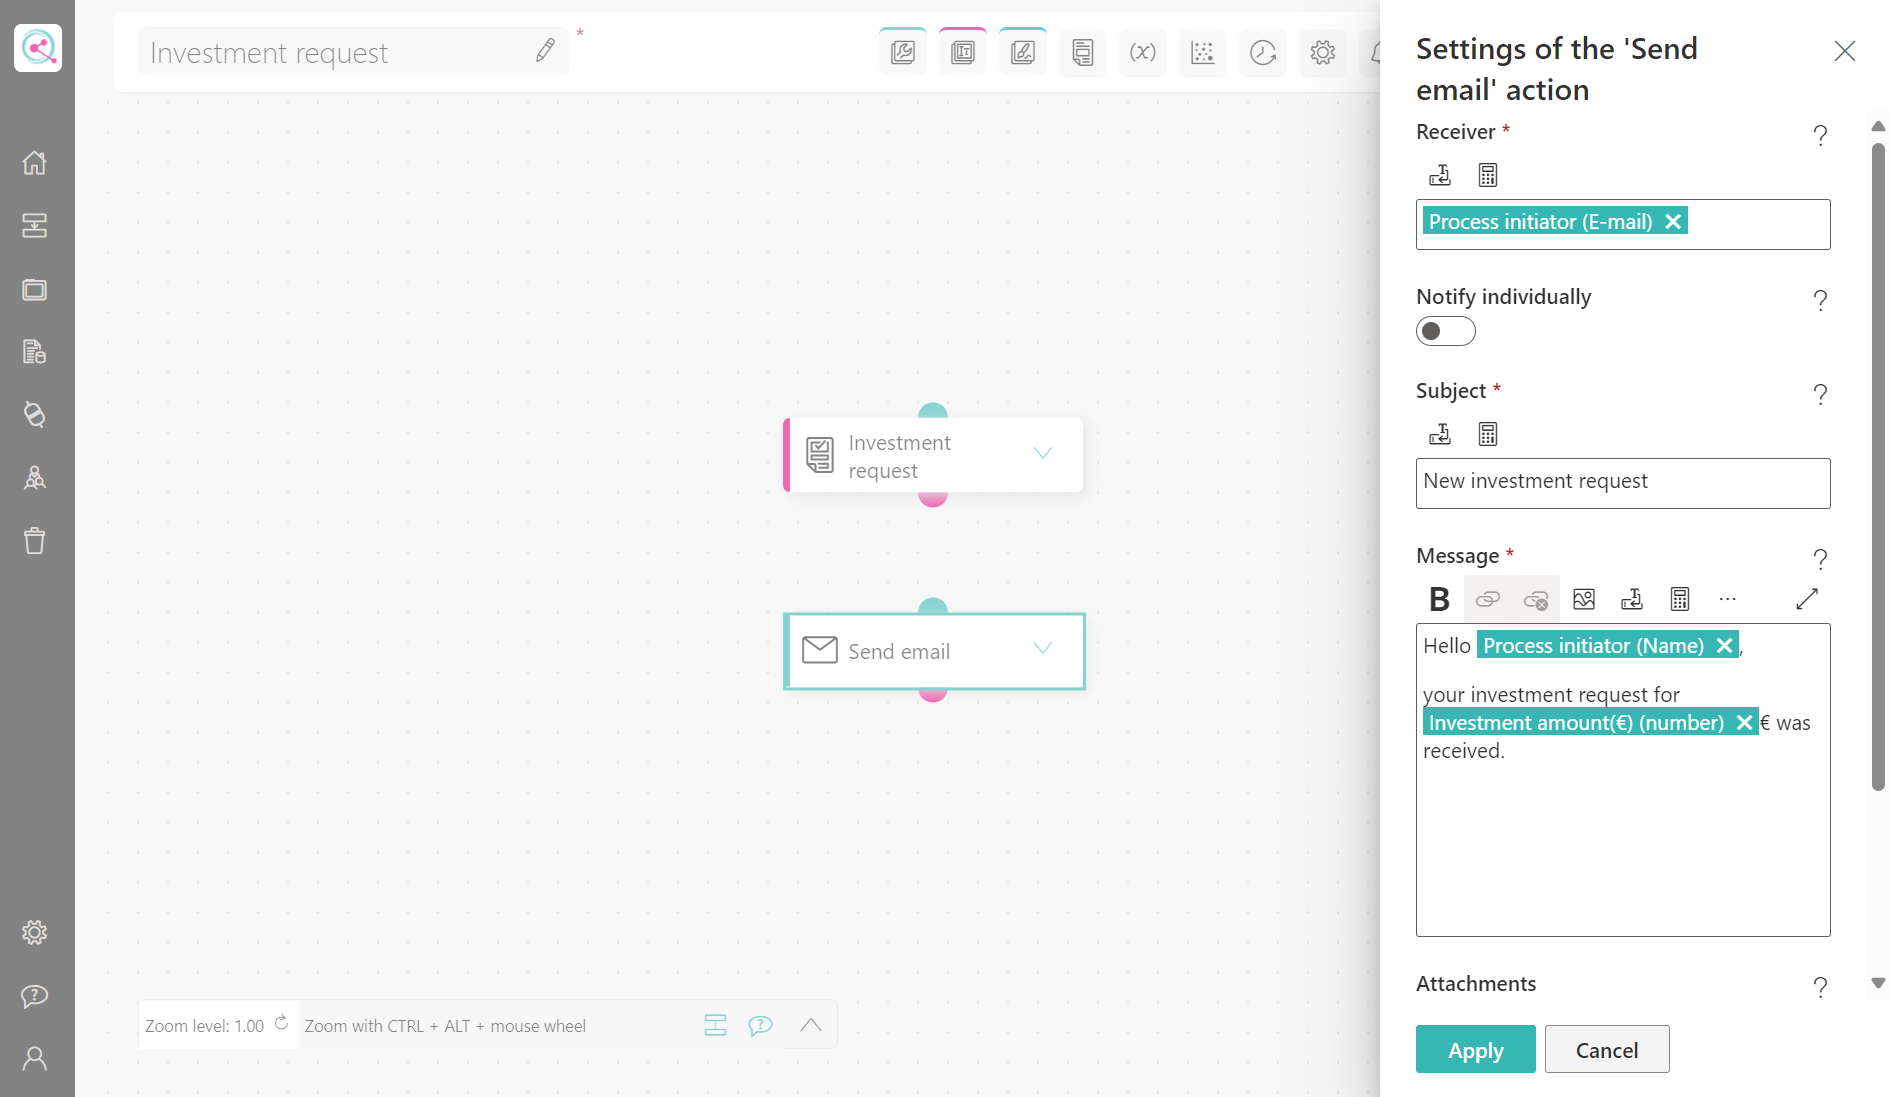
Now you need to configure the Send email action to define the recipient, subject and content. To do this, you can open the settings either by double-clicking or via the context menu by clicking on the arrow () on the right-hand side of the inserted Send email action and selecting Settings.
In the panel that opens, you can define to whom the email should be sent, which subject should be used and, of course, the content of the email. You can of course enter the e-mail address, subject etc. and thus, for example, always send the same e-mail to the same people each time a process is executed. This can of course make sense in some cases. However, you will often want to send the e-mail to different people depending on the process execution. For example, you may want to send an e-mail to the person who started the process, e.g. to transmit the result of the release. Or you may want to insert a form value in the content of the e-mail. For such dynamic behavior, linqi offers placeholders.
Placeholder
Placeholders allow you to define a value that is resolved when the process is executed. For example, you can reference the e-mail address of the person who started a process. If person A now starts this process, this placeholder is resolved to the e-mail address of this person. If, on the other hand, person B starts the process, the e-mail address of person B is inserted there.
To insert such a placeholder for the recipient of the email address, click on the placeholder button () above the recipient. You can select the placeholder in the window that opens. In this example, we select Process values as the type of placeholder, Process initiator as the value below and Email as the formatting. Once you have selected all the values, you can insert the placeholder by ticking the box below the last drop-down field. With this configuration, the email is sent to the person who started the process when it is executed.
You can now enter e.g. new investment request as the subject and a short text in the body of the e-mail describing that a new investment request has been received.
Here, for example, you can also reference form values via placeholders by selecting Form value as the type of placeholder, the created form as the form and then the control element. Each control element that you create in a form is then automatically available as a placeholder.

Once you have filled in all the fields, you can apply the configuration of the Send e-mail action using the button below.
Link elements
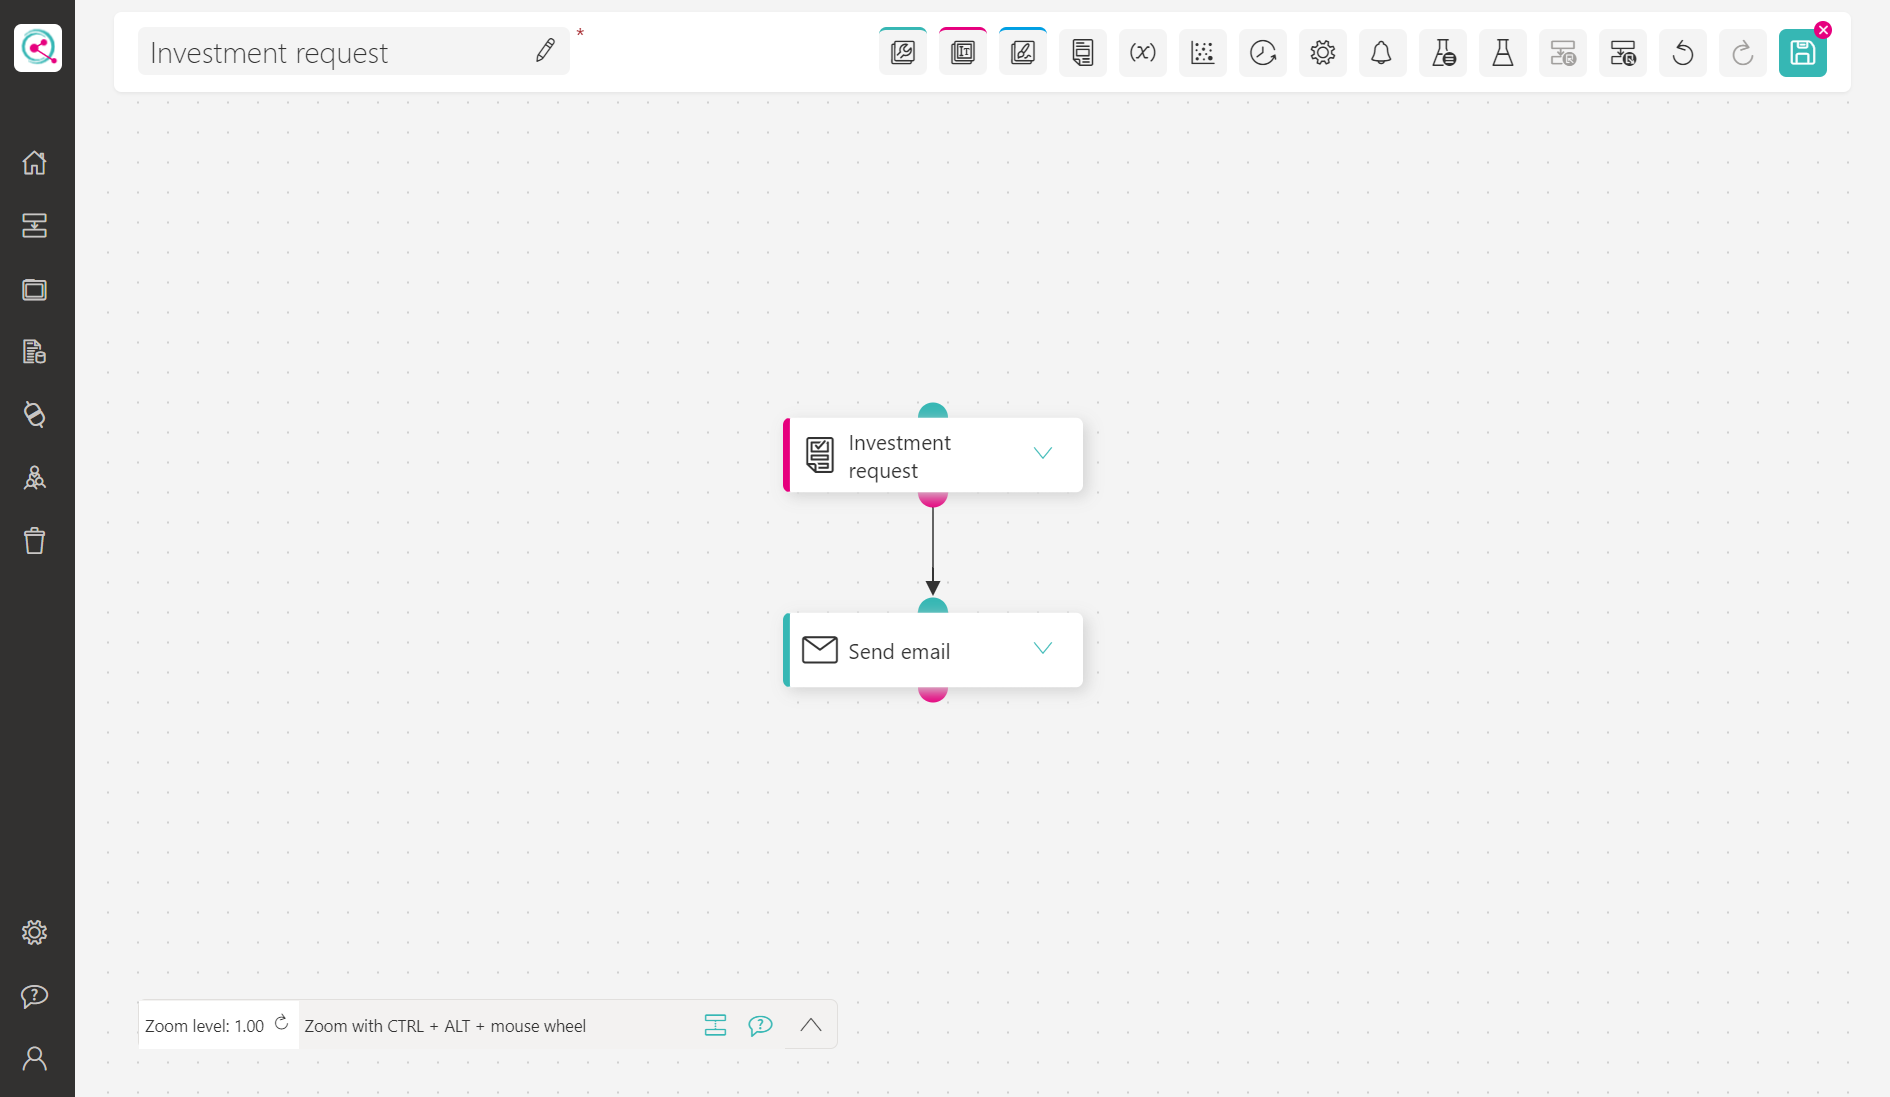
The two elements in the process are not yet linked to each other. However, this is important to tell linqi in which order the elements of the process are executed. To do this, you must link the starting point of the form with the entry point of the send email action.
In linqi, starting points are always shown as circles, in pink by default, at the bottom of a process element. Inboxes, on the other hand, are displayed at the top of a process element, in turquoise by default. You can now simply drag and drop a link from the starting point of the form to the entry point of the email. You have thus defined that the form is filled out first and the e-mail is sent automatically when the button in the form is clicked.

If you save before you have linked the elements, linqi will display a warning. This is because there are several nodes without a previous node, so linqi cannot determine a unique node at which the process should start. There must therefore always be exactly one node without a previous node in a process so that linqi can execute a process.
The process is saved despite the warning.
You have now defined a very simple initial process flow. The next step is to test this process flow.